Wet-on-Wet vs. Wet-on-Dry: Understanding the Two Foundations of Watercolor
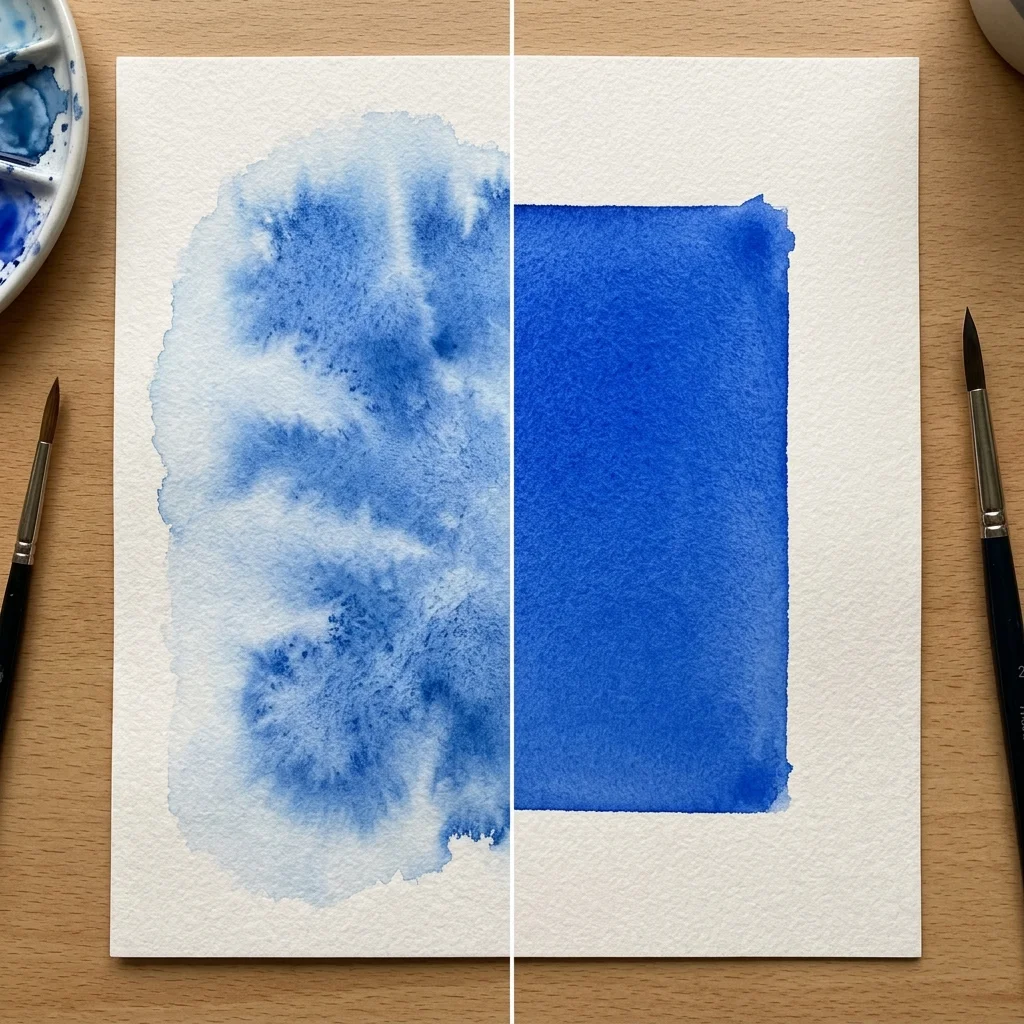
"If there's one thing that separates a watercolor painter who feels in control from one who feels constantly surprised by their paint, it's understanding these two techniques."
Everything else, like edges, atmosphere, detail, and depth, comes from knowing when to use each technique.
1. What Is Wet-on-Wet?
Wet-on-wet means applying wet paint onto wet paper. You dampen the paper first with clean water, then drop color in while the surface is still shiny.
What happens next is something beginners either love or find intimidating. The paint moves on its own. It blooms, spreads, and finds its own edges. You guide it instead of controlling it.
The results are soft, atmospheric, and unpredictable in a good way. Wet-on-wet is how you paint a loose background wash, a misty sky, or the soft, blurry look of foliage behind a bird. It's also how many beginners accidentally ruin a painting by going back into a wash that has already started to dry, which creates unwanted blooms called cauliflowers.
The most important thing to remember is timing. With watercolor, when you paint often matters more than how you paint. Wet-on-wet only works while the paper is still shiny. Once the shine is gone, you have missed the wet-on-wet window.
2. What Is Wet-on-Dry?
Wet-on-dry means applying wet paint onto completely dry paper. The paint stays exactly where you put it and dries with a clean, defined edge.
This is how you paint the crisp details that make a bird look real, like the sharp edge of a beak, the dark line through an eye, or the boundary between a robin's orange breast and its olive back. Wet-on-dry gives you precision and control.
The rule here is patience. The paper must be completely dry, not just look dry. It should feel room temperature when you hold your hand close. Painting wet-on-dry onto damp paper creates the unwanted blooms you want to avoid.
3. Side by Side
The difference between the two techniques is visible in almost every successful watercolor painting.
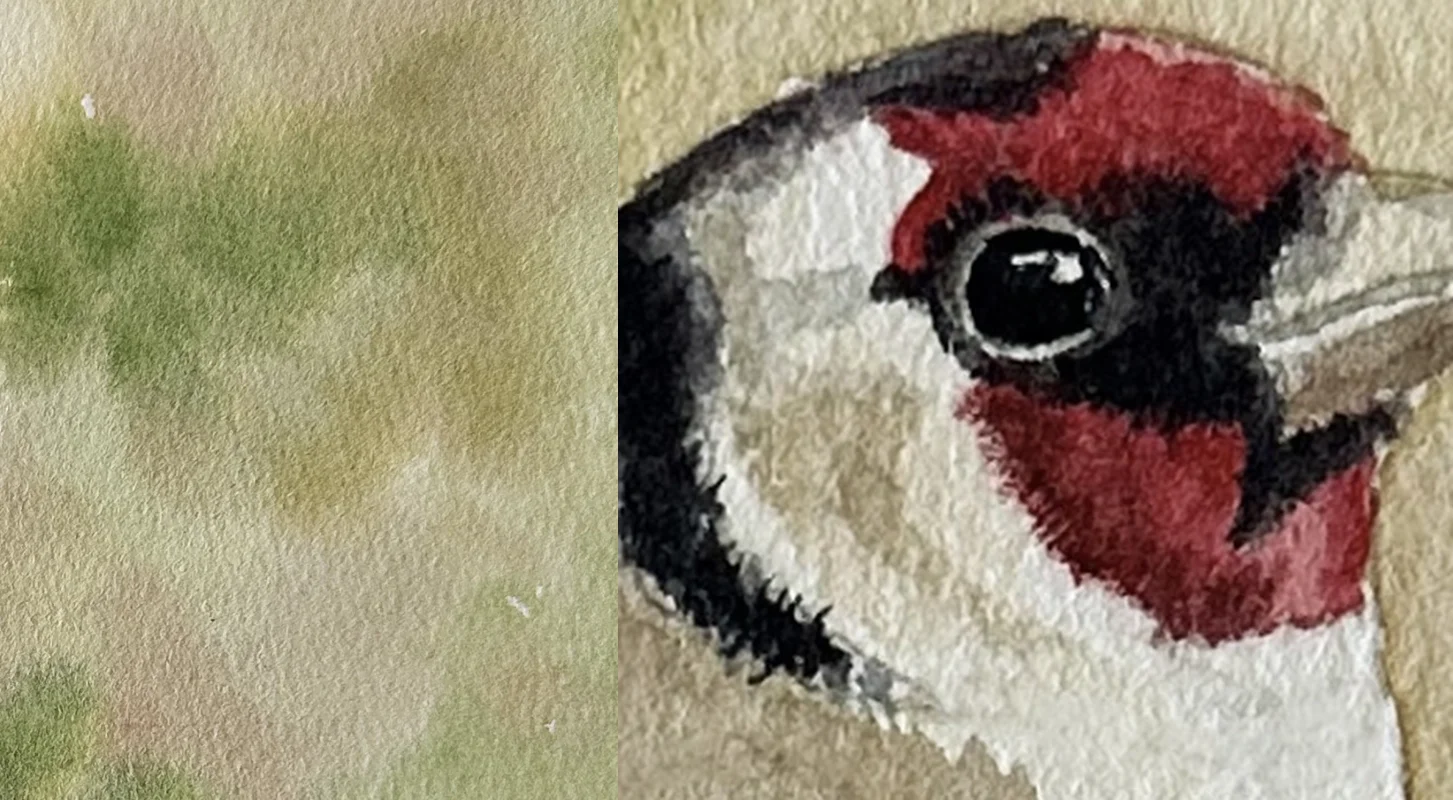
The soft, atmospheric background behind a bird comes from wet-on-wet. The crisp, confident eye is painted with wet-on-dry. The loose wash that suggests foliage without painting every leaf uses wet-on-wet. The sharp edge where the wing meets the body is done with wet-on-dry.
One technique creates mood. The other creates structure. Both are essential.
4. When to Use Each
Reach for wet-on-wet when:
- Painting backgrounds and skies.
- Suggesting soft foliage or distance.
- Creating atmosphere and mood.
- You want soft, lost edges.
- You're working on the early stages of a painting.
Reach for wet-on-dry when:
- Adding detail and definition.
- Painting eyes, beaks, and feet.
- Sharpening important edges.
- Building darker values over dried washes.
- You're working on the final stages of a painting.
A helpful way to think about it is that wet-on-wet opens up a painting, while wet-on-dry finishes it.
5. The Biggest Beginner Mistakes
Going back into a drying wash: This is the most common watercolor mistake. A wash looks almost dry, and you go back in to adjust something. The result is a hard-edged bloom that's almost impossible to remove. If a wash is drying, leave it alone. Walk away and come back when it's completely dry.
Painting wet-on-dry onto damp paper: You think the paper is dry, but it isn't. The new paint blooms unexpectedly into the damp area underneath. Always check by holding your hand close to the paper surface. If it feels cool, it's still damp. If it feels room temperature, it's dry.
Using only one technique throughout: A painting done entirely in wet-on-wet has no structure or focus. A painting done entirely in wet-on-dry feels rigid and overworked. Most beginners default to one technique and wonder why something feels off. The answer is almost always that the painting needs the other one too.
Not wetting the paper evenly: Wet-on-wet only works if the paper is evenly damp. Dry patches in a wet surface create hard edges where you don't want them. Use a large brush and clean water to wet the paper thoroughly and evenly before adding any color.
6. The Secret
Great watercolor paintings don't rely on a single technique.
The most atmospheric and convincing bird paintings almost always use both techniques, sometimes even in the same area of the painting but in different layers. A loose wet-on-wet wash sets the mood. Once it is dry, careful wet-on-dry marks bring the subject into focus.
The skill isn't deciding which technique is better. The skill is knowing when each one serves the painting.
Start loose. Let it dry. Then commit.
Practice This Today
Take a small piece of watercolor paper. Wet half of it with clean water and drop a wash of color onto the wet area. Watch it bloom. Leave the other half dry and paint the same wash onto the dry surface. Notice how it stays exactly where you put it.
That's the whole lesson in one exercise: two techniques, five minutes, completely different results.
Once you can feel the difference between wet and dry paper, you'll start making better decisions naturally without having to think about it.
Continue learning with the next step in this watercolor series.